


Haven't updated much but here is what I have done up to now. Just going to wait for the weather to warm up so I can start priming parts.


The weather has been a little crazy. Its gotten around the 40's so I couldn't prime much, but managed to spray a couple pieces when it was nice on of the days. Will have to start learning to use the airbrush and go from there!
Now that school is done, hopefully I'll have some free time, other than work. Today I primed some more parts.
 The muffler had 2 sink marks that were filled with Testor's Putty, which still showed up messy after sanding and a coat of primer. I had to sand the spots down even more and then added another coat.

 Valves covers were lightly primed so no detail will be lost.
 Shifter broke during process of cutting excess plastic.
 Made a new one from a needle and bent it to the appropriate angle. Spent a couple hours carefully sanding down the knob since it was a little too big.
 Finally made a panel scribe tool from an old mechanical pencil and a sewing needle.


Finally got the nerve to use the airbrush and start painting parts. It was a lot easier than I thought, I wish I would have done it earlier. This is the first time ever using an airbrush and I have learned a lot already from this first paint round. I painted most of the engine parts that needed XF-16.


Painted the cam covers last Sunday I believe. I tried to use a toothpick to paint/drybrush the raised lines with silver but didnt look as good so I painted it over with another coat.

Here's what I got done tonight


Here's what I got done tonight


There were so many stages of masking for the interior and here is the final masking! This one took a little more time especially masking off the gear box area and tight areas

Looks like I'll need to buy some new decals.... The ones from the kit were very brittle, especially since the they are so old


Looks like I'll need to buy some new decals.... The ones from the kit were very brittle, especially since the they are so old

Been a while. Now that I'm done with school, I managed to finish the interior. Shifter was made from a sewing needle and sanded the knob down to scale, which took some time. Overall, lots of masking and some detail painting.


Next will be to finish up the engine

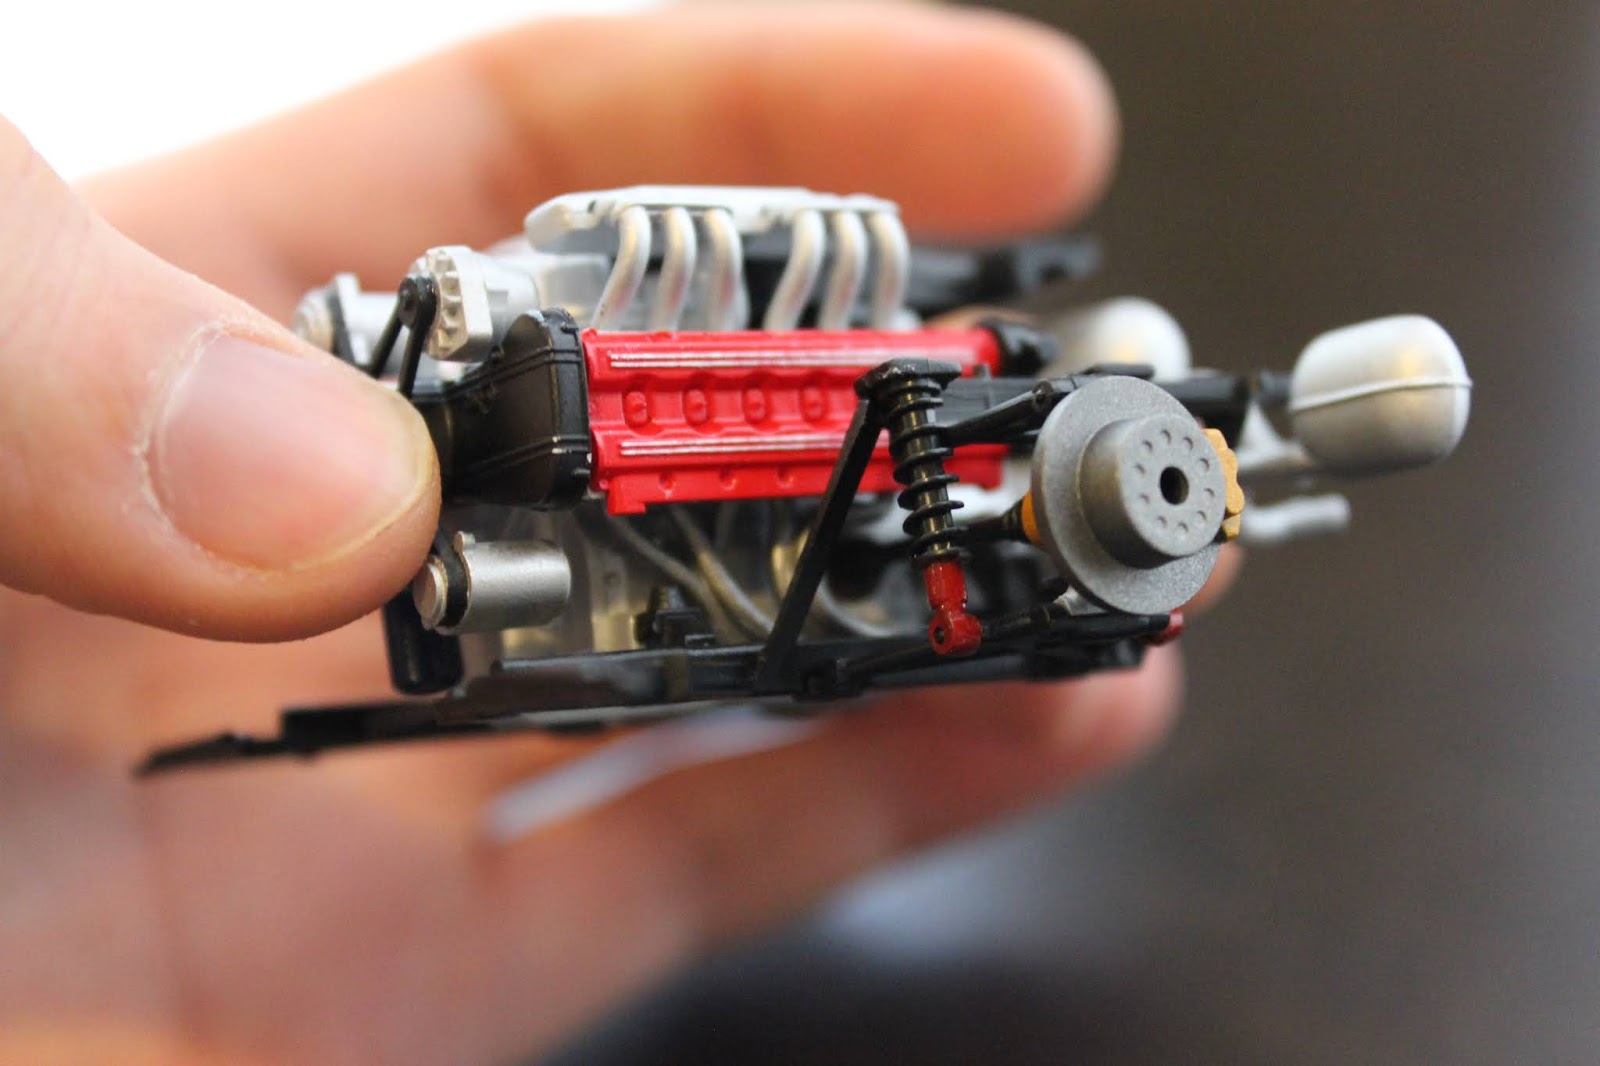
Been a while since I last worked on the Testarossa. Finally had the courage to get back to work on it. Here is the completed engine. I also finished the front suspension (not pictured).
Next, I'll have to put together the firewall, paint the body, and detail.


Next will be to finish up the engine

Been a while since I last worked on the Testarossa. Finally had the courage to get back to work on it. Here is the completed engine. I also finished the front suspension (not pictured).
Next, I'll have to put together the firewall, paint the body, and detail.


No comments:
Post a Comment